![[Solutions] Object Detection 0 to 0.01: YOLOv4](/images/cover/12.jpg)
The object recognition solution: YOLOv4.
Introduction
Since achieving image text recognition through CNN in 2019,
my study and practice of neural networks have stagnated for a long time.
So this time, I aim for a slightly more challenging target with object recognition:
letting the neural network find something in the images.
The object recognition solution is actually quite simple: YOLOv4.
Requirement
- Open source project: darknet - YOLOv4
- Annotation tool: labelImg
- Reference: How to train (to detect your custom objects)
Sample Preparation
For the experiment, I chose to use a slider captcha developed by a well-known Chinese internet company for demonstration, because sliders are easy to recognize as targets.
Traditional image processing (like Pillow) does not work well for slider captcha recognition.
Randomly select a type of slider captcha and download its background images in bulk.
The selected samples for the current experiment have various situations, but the ultimate goal is to find all slider positions in the images.
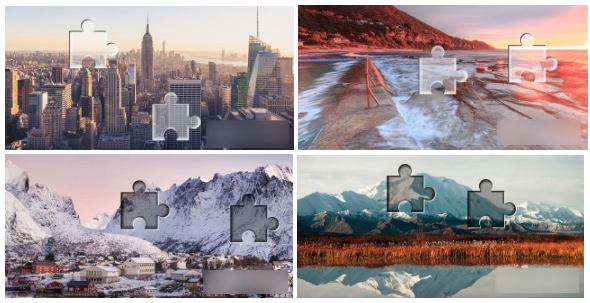 slide captcha background images
The annotation of the images is roughly as follows.
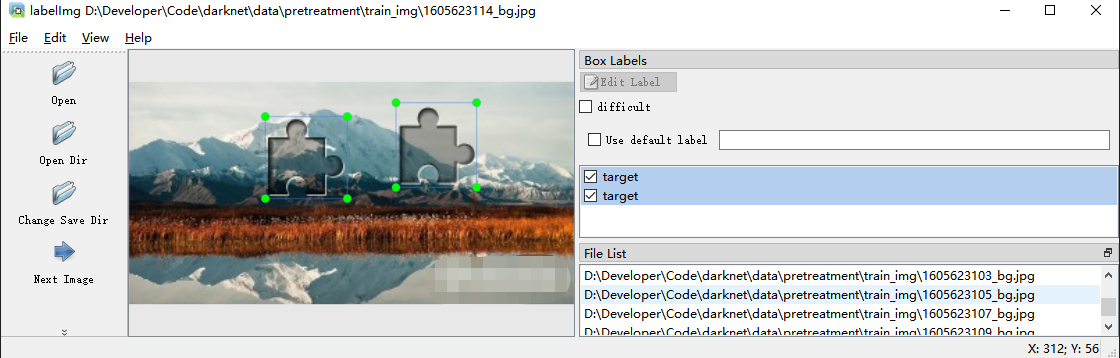 annotate object by labelImg
The annotated information will be stored in .txt files in YOLO format.
 annotation object data
Data Preprocessing
First, understand the data-related files,
which can be divided into 6 categories, all stored in the “darknet\data” directory.
- Image samples containing objects (.\obj\xxx.jpg)
- Object annotation data corresponding to image samples (.\obj\xxx.txt)
- Text files with the same name as the image samples in the same folder
- Collection of training data paths (train.txt)
- Collection of prediction data paths (test.txt)
- Object classification (obj.names)
- Input data configuration (obj.data)
Object classification (obj.names)
Object classification is a text file,
with each line corresponding to a category name, and the line number being the index.
targetImage Samples & Annotation Data (.\obj\xxx.<jpg|txt>)
Each .jpg image sample can contain multiple inspection objects, and the corresponding annotation data file .txt will also contain the same number of inspection objects.
Each .jpg image sample corresponds to an annotation data .txt file stored in the same directory.
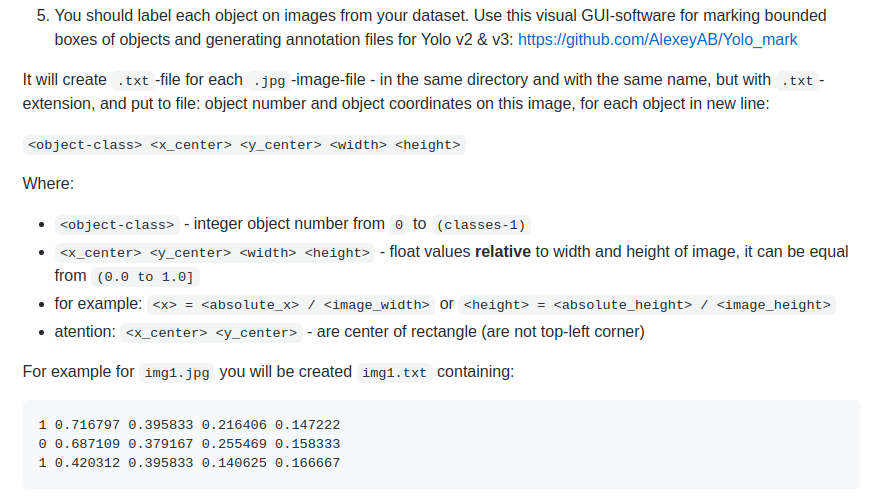
The annotation data format is one detection object per line:
- The class index
- The midpoint of the bounding box on the x and y axes
- The width and height of the bounding box
 annotation object format
1 0.716797 0.395833 0.216406 0.147222
1 0.420312 0.395833 0.140625 0.166667
The YOLO format sample data generated by labelImg needs to be converted to the above format.
For specific preprocessing, refer to “How to train (to detect your custom objects)” point 5.
 yolov4 document
Batch conversion can be achieved by modifying the official example script “/scripts/voc_label.py”.
The final files in the obj directory should look roughly like this:
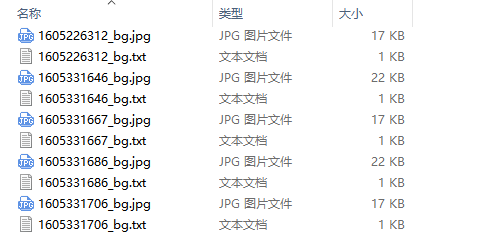 obj directory
Train & Test Set Path Collection (train.txt & test.txt)
According to the official guide,
the dataset is divided into training and testing sets in a certain proportion,
and the relative paths of the images are stored in the train.txt and test.txt files.
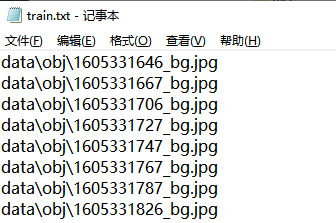 train.txt
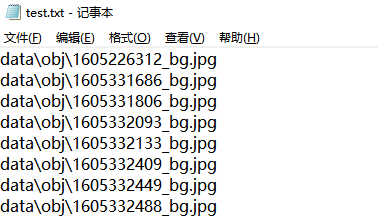 test.txt
Input Data Configuration (obj.data)
Indicates model data set related information:
- classes: The number of object categories
- train: The location of the train set path files
- test: The location of the test set path files
- names: The location of the object classification file
- backup: The output path location
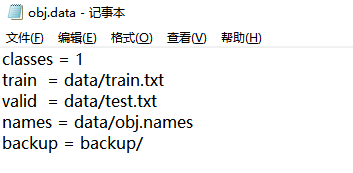 obj.data
Modify Configuration
The related configuration files are all stored in the “darknet\cfg” directory.
Network structure definition file “yolov4-obj.cfg”.
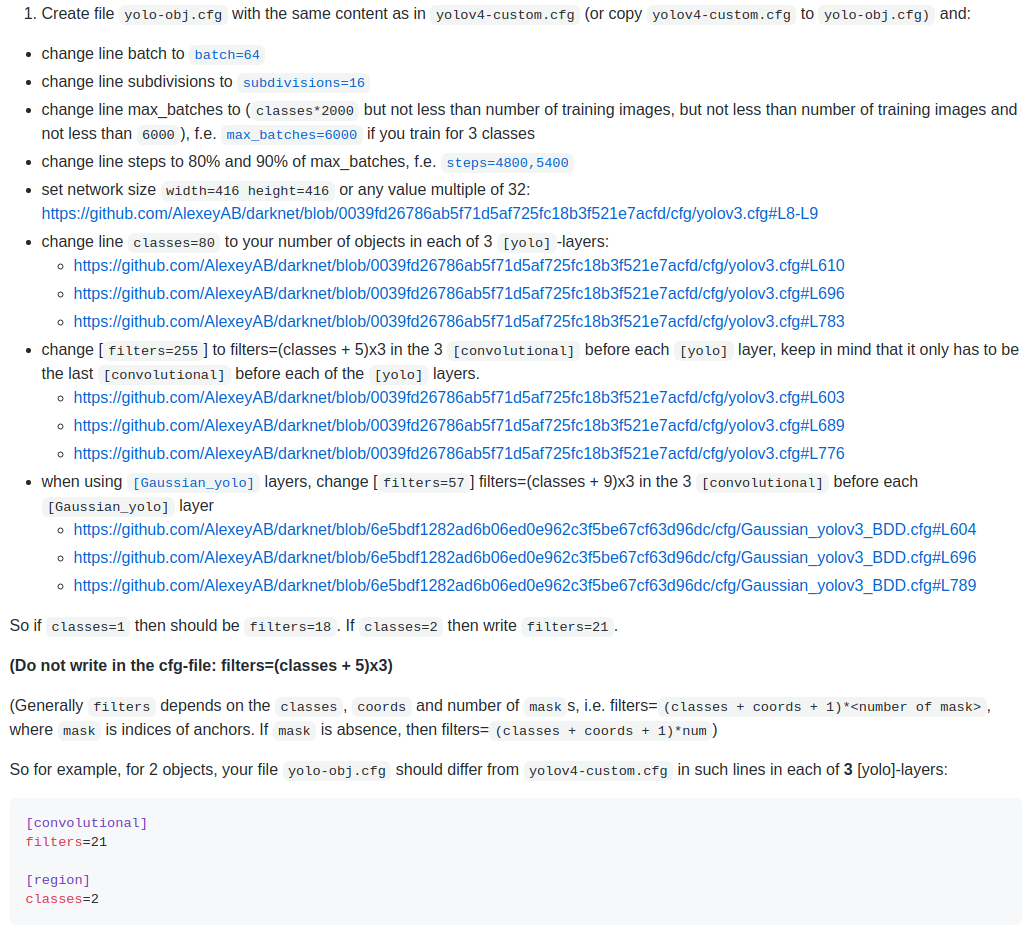
For details on modifying the hyperparameters,
refer to “How to train (to detect your custom objects)” point 1.
 yolov4 document
In the configuration directory,
copy “yolov4-custom.cfg” to “yolov4-obj.cfg” and modify the configuration part:
- batch: the number of small batches (can be adjusted according to GPU memory)
- subdivisions: further subdivision of each small batch
- max_batches: the maximum number of small batches for training
- the training stops once this number is exceeded
- Usually set to classes * 2000 and cannot be less than the number of image samples
- steps and scales: related to learning rate adjustment
- Steps: Usually set to 80%~90% of max_batches
- Scales: Usually, no need to adjust
- width and height: set the size of the network input
- Generally set to be consistent with the image samples, or any multiple of 32
- classes: set the number of categories
- Must be consistently modified for all [yolo] layers
- Must be consistent with the sample target detection count
- filters: set the number of convolutional kernels in specific locations
- Must be set for the [convolutional] layer connected to the [yolo] layer
- Must be set to (classes + 5) * 3
batch=64
subdivisions=16
max_batches=2000
steps=1600, 1800
scales=.1,.1

... ...
Pre-trained Weight Files
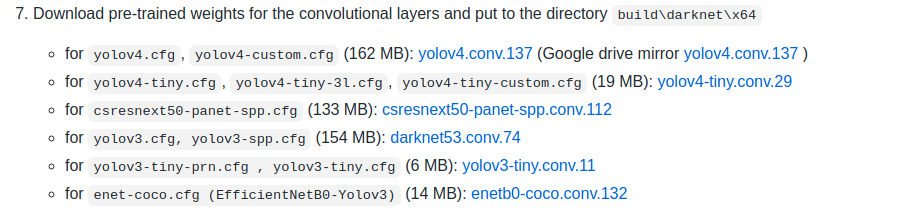
The related files for pre-training are stored in the “darknet\weight” directory,
Pre-trained weight file (yolov4.conv.137).
Each network has a corresponding pre-trained convolutional layer weight file.
Refer to “How to train (to detect your custom objects)” point 7 for which file to download.
 yolov4 document
For this experiment, using the YOLOv4 network, download the corresponding pre-trained weight file “yolov4.conv.137”.
Training the Model
Refer to ““How to train (to detect your custom objects)” points 8 and 9 for model training.
For multi-GPU training, refer to “How to train with multi-GPU”.
darknet.exe detector train data/obj.data yolo-obj.cfg yolov4.conv.137Training Results
All .weights weight files output after training are stored in the backup directory.
Because the training process archives the weight file at each stage, the directory contains multiple weight files, generally archived once every 1k iterations.
A very important point to note here:
When using the model in a production environment, only the best weight file is needed.
The selection of the weight file is not based on the highest iteration count but on the highest mAP (mean average precision) or IoU (intersect over union) values.
For the specific reason, see “When should I stop training” point 2.2.
For example,
compare the weight files archived at each stage between 1k and 5k iterations:
darknet.exe detector map data\obj.data cfg\yolov4-custom.cfg backup\yolov4-custom_1000.weights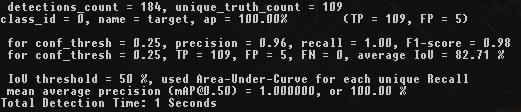 1k iterations
darknet.exe detector map data\obj.data cfg\yolov4-custom.cfg backup\yolov4-custom_2000.weights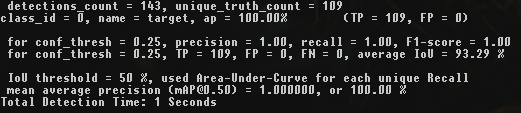 2k iterations
darknet.exe detector map data\obj.data cfg\yolov4-custom.cfg backup\yolov4-custom_3000.weights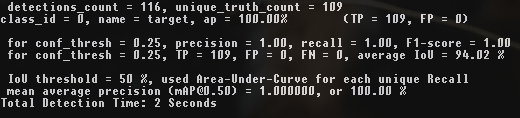 3k iterations
darknet.exe detector map data\obj.data cfg\yolov4-custom.cfg backup\yolov4-custom_4000.weights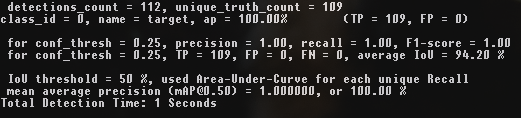 4k iterations
darknet.exe detector map data\obj.data cfg\yolov4-custom.cfg backup\yolov4-custom_5000.weights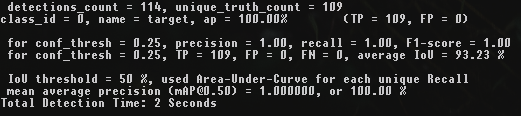 5k iterations
It can be seen that the highest mAP and IoU values are at 4k iterations, not at 5k iterations.
Testing the Model
Refer to “How to use on the command line” for model testing.
the command format is roughly as follows:
darknet.exe detector <train/test/valid/demo/map> <data> <cfg> <weights (optional)> [-ext_output <ext>]Verify the results on the test set.
darknet.exe detector valid data\obj.data cfg\yolov4-custom.cfg backup\yolov4-custom_last.weightsDemonstrate the object detection effect of the model on images.
darknet.exe detector test data\obj.data cfg\yolov4-custom.cfg backup\yolov4-custom_last.weights -ext_output data\0967f9db79f4462197bed6565a17ed63.jpg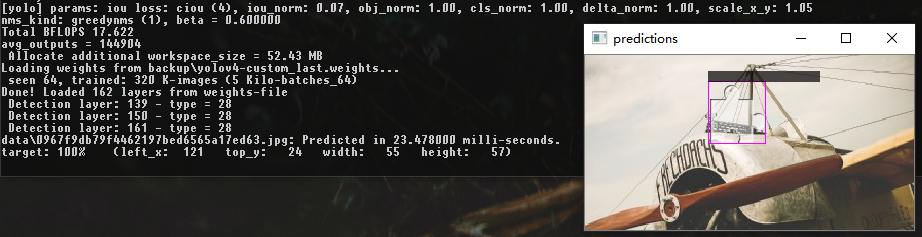 detect result
Demonstrate the object detection effect of the model on videos.
darknet.exe detector demo data\obj.data cfg\yolov4-custom.cfg backup\yolov4-custom_last.weights -ext_output data\test.mp4 detect result (videos)
It’s cool :)
Statement
The purpose of this experiment is solely to reproduce custom single-class object detection using YOLOv4.
![[WriteUp] HackTheBox - Blurry](/images/cover/11.jpg)
![[WriteUp] HackTheBox - Instant](/images/cover/14.jpg)
![[WriteUp] HackTheBox - Bizness](/images/cover/23.jpg)